✍️ Written & Updated by Ofir The Fermenter · 📅 May 21, 2026
I brewed my first batch of kombucha in a small apartment in Tel Aviv with no idea what I was doing. I’d read a few guides online, ordered a SCOBY, and crossed my fingers.
It worked. But it took me another dozen batches to understand why it worked — and a lot more to figure out how to make it consistently great. That’s what this guide is for.
After 500+ batches at Kommbucha.com, selling at Tel Aviv coffee shops, and helping hundreds of people start their own brews, here’s everything I wish someone had told me at the beginning.
What You’ll Need
Equipment
- 1-gallon glass jar (or larger) — glass only, never plastic or metal
- Tightly woven cloth or coffee filter — to cover the jar and keep insects out while allowing airflow
- Rubber band — to secure the cover
- Glass bottles with swing-top lids — for second fermentation (Grolsch-style bottles work well)
- Long wooden or plastic spoon — for stirring
- pH strips or a pH meter — optional but useful for beginners
- Thermometer — to monitor fermentation temperature
Ingredients (for 1 gallon / ~3.8 litres)
- 1 SCOBY with at least 1–2 cups of starter liquid (previously brewed kombucha)
- 3.5 litres of filtered water
- 8 tea bags (black tea, green tea, or a combination) — or 2 tablespoons loose leaf
- 200g (1 cup) white cane sugar — organic if possible
A note on tea: black tea is the most reliable for beginners. It has high tannin content that the SCOBY loves. Green tea produces a lighter, more delicate kombucha. I’d start with black and experiment later.
A note on sugar: use plain white cane sugar for your first batches. Honey, maple syrup, and other alternatives can work — but they change the fermentation dynamics in ways that are easier to manage once you understand the basics.
First Fermentation (F1): Making Your Kombucha
Step 1: Brew Your Sweet Tea
Bring about 1 litre of filtered water to a boil. Remove from heat and add your tea bags. Steep for 5–10 minutes — longer steeping produces more tannins, which is good for SCOBY health but can make the finished kombucha more astringent.
Remove the tea bags and add your sugar while the tea is still hot. Stir until completely dissolved. This is your sweet tea base.
Step 2: Cool the Tea
Add the remaining cold filtered water to bring the temperature down. This is critical — never add your SCOBY to hot liquid. Anything above 35°C (95°F) will damage or kill it. You’re aiming for room temperature, ideally 20–25°C (68–77°F).
I once ruined a SCOBY by being impatient. Don’t be impatient.
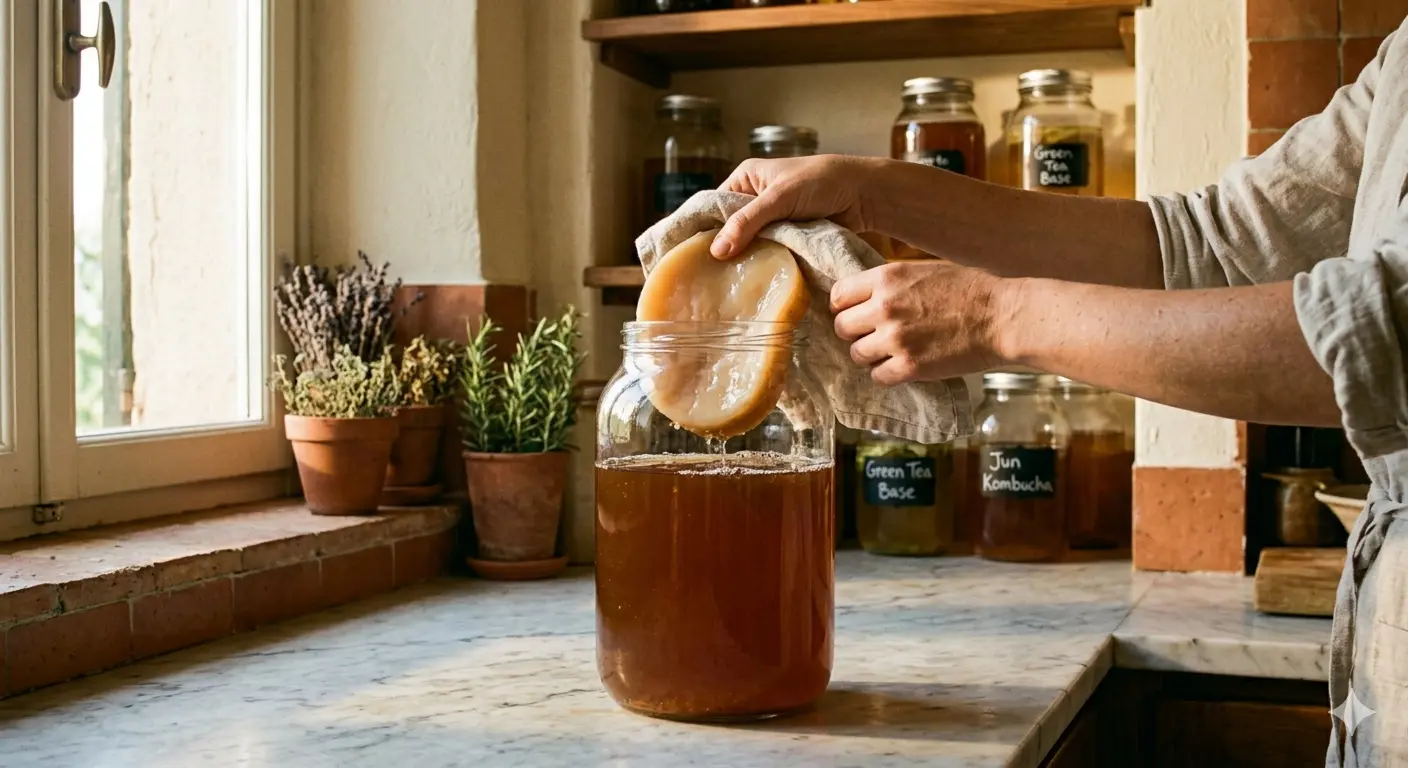
Step 3: Add the SCOBY and Starter Liquid
Pour the cooled sweet tea into your clean glass jar. Add your starter liquid first — this acidifies the environment immediately, which protects against contamination. Then gently place the SCOBY on top.
The SCOBY might sink, float sideways, or do something unexpected. That’s fine. It doesn’t need to sit perfectly on the surface — it’ll find its position.
Step 4: Check the pH
If you have pH strips, test the liquid. You’re looking for a starting pH of 4.5 or below. This acidity level prevents harmful bacteria from competing with your SCOBY. If the pH is higher, add a little more starter liquid or a splash of plain white vinegar.
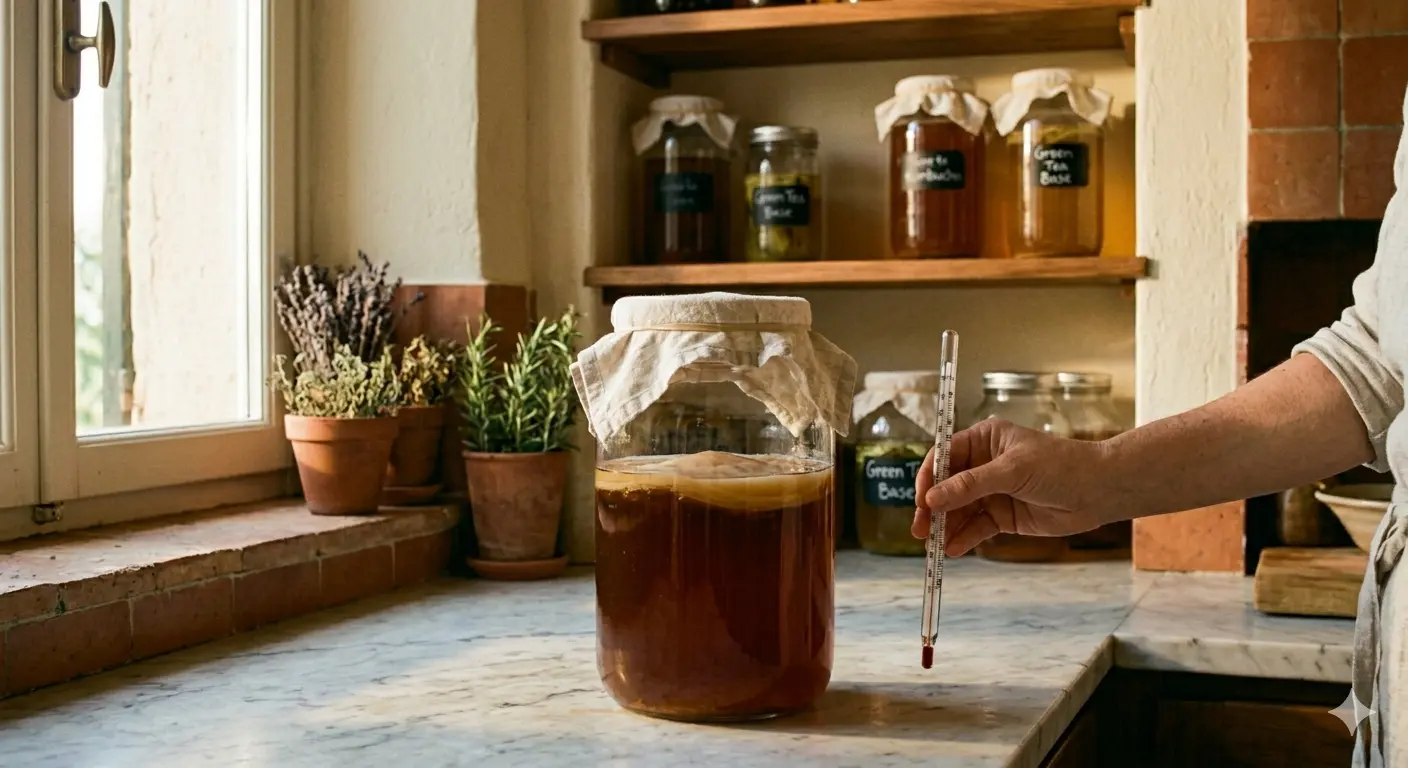
Step 5: Cover and Ferment
Cover the jar tightly with your cloth and secure with the rubber band. Place it somewhere:
- Warm: 20–27°C (68–81°F) is ideal. Below 18°C (64°F), fermentation slows dramatically. Above 30°C (86°F), you risk off-flavours.
- Away from direct sunlight: UV light can damage the cultures
- Away from strong-smelling foods: your kombucha will absorb ambient odours
- Undisturbed: try not to move it around during fermentation
In Tel Aviv summers, my kitchen runs hot — I’ve had batches ferment in 5 days. In winter, the same batch takes 14. Temperature is the biggest variable in fermentation time.
Step 6: Taste and Test
Start tasting after 7 days. Use a clean straw or spoon to draw a small amount from beneath the SCOBY. You’re looking for a balance of tart and sweet — not too sweet (under-fermented), not too vinegary (over-fermented).
Most batches are ready between 7 and 21 days. When it tastes right to you, it’s ready. Trust your palate more than any timer.
What You’ll See During Fermentation
First-time brewers often panic at normal fermentation activity. Here’s what’s normal:
- A new SCOBY forming on the surface — thin, pale, slightly translucent layer. This is the “baby” SCOBY. It’s a sign of healthy fermentation.
- Brown stringy bits floating in the liquid — yeast strands. Completely normal and harmless.
- The original SCOBY changing colour — it will darken over time. Normal.
- Slight fizzing when you disturb the liquid — CO2 being released. Good sign.
- A tangy, slightly vinegary smell — this is what healthy kombucha smells like. If it smells like nail polish remover or rotting food, something’s wrong.
When to Worry: Signs of Contamination
In six years of brewing, I’ve had contaminated batches. It happens. Here’s how to spot it:
- Fuzzy mould on the surface — any colour (black, green, white and fuzzy) means contamination. Discard everything including the SCOBY. Do not try to save it.
- Unusual smell — sulphurous, putrid, or strongly chemical smells indicate a problem
- Pink or unusual colouration not explained by added fruits — can indicate contamination
The white film that sometimes forms on the surface is often kahm yeast — not mould. It’s flat, smooth, and white. Unpleasant but harmless. Skim it off and carry on.
Second Fermentation (F2): Carbonation and Flavour
Once your kombucha is fermented to your taste, it’s time to bottle.
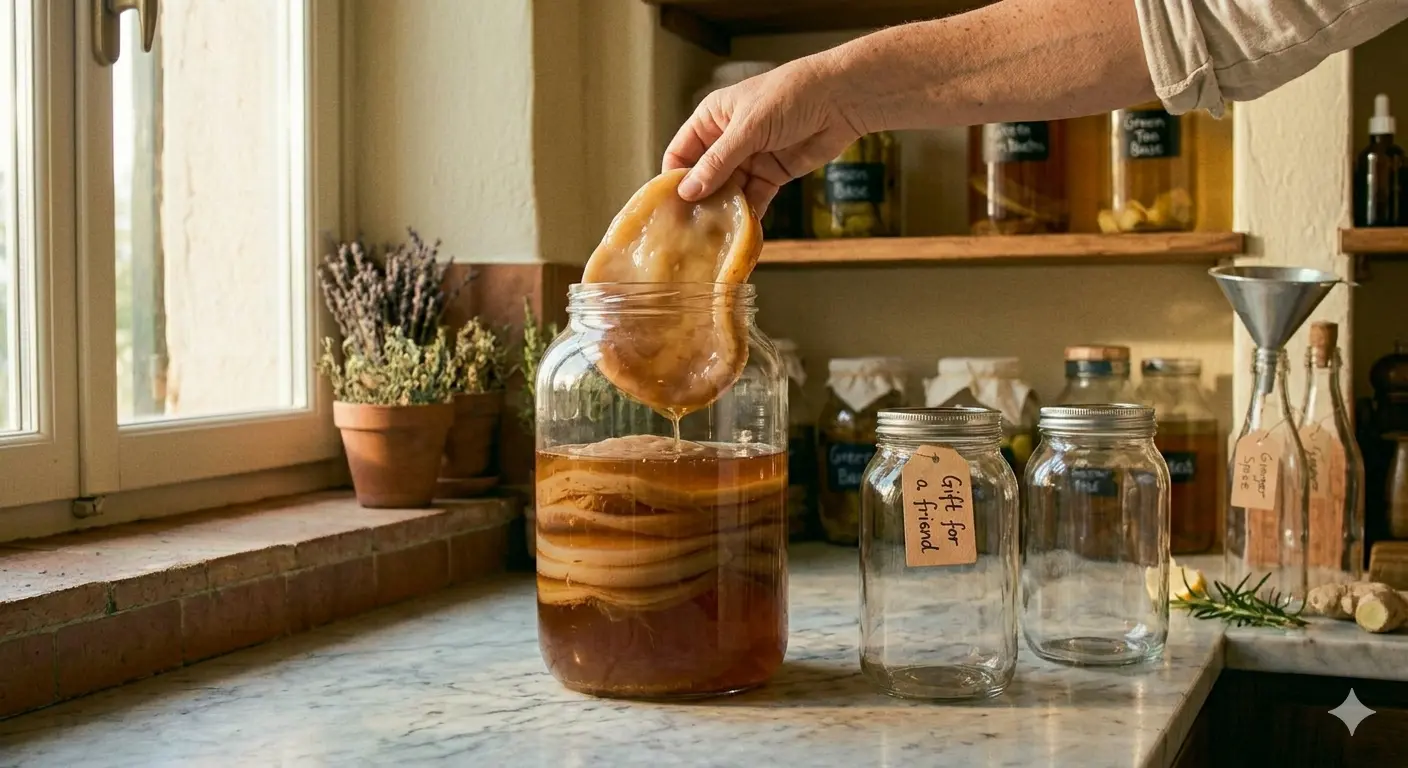
Step 1: Remove the SCOBY
With clean hands, remove both SCOBY layers (the original and the new one). Set them aside in a clean bowl with 1–2 cups of the kombucha you’re about to bottle — this becomes your starter liquid for the next batch.
Step 2: Bottle Your Kombucha
Pour your kombucha into clean glass bottles, leaving about 2–3cm of headspace at the top. This space is essential for carbonation to build without the bottles exploding.
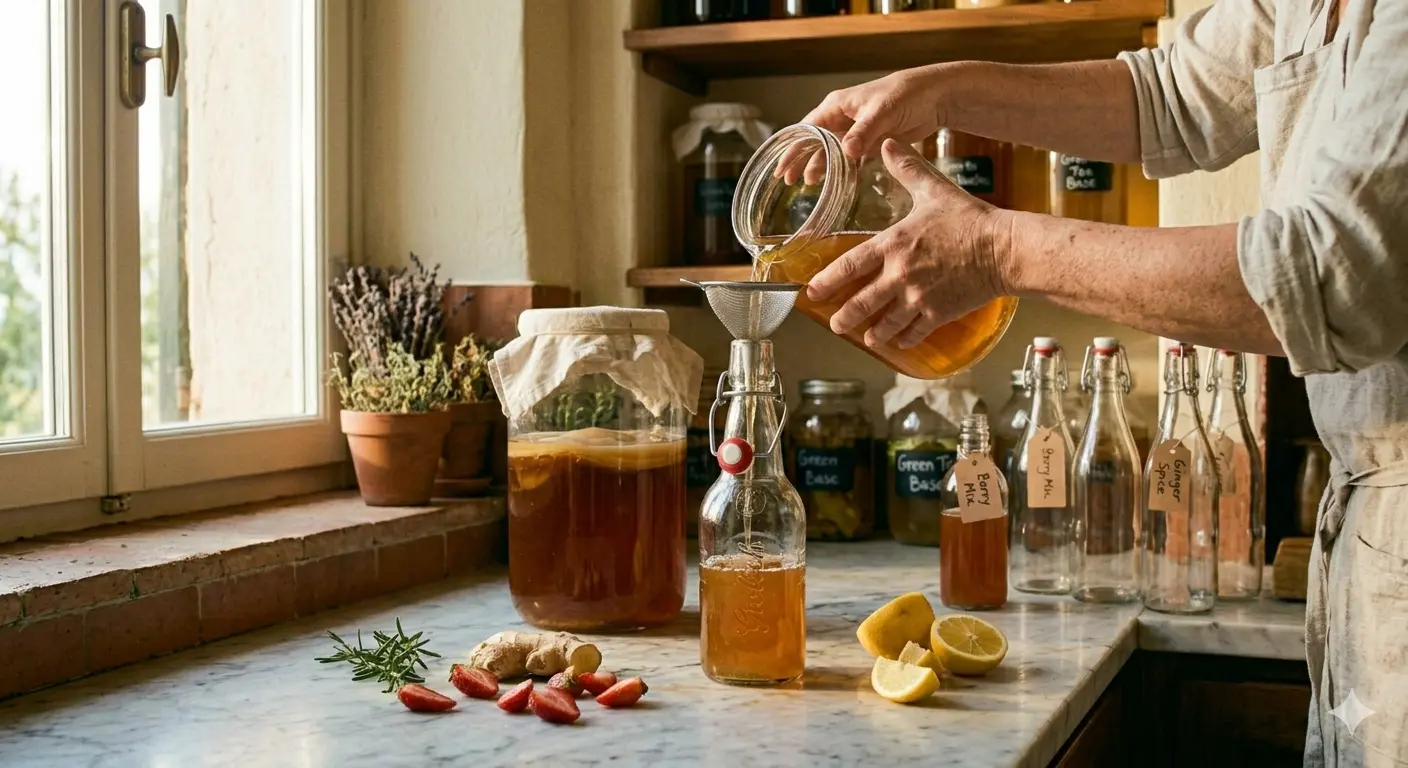
Step 3: Add Flavourings
Now add your flavourings directly to each bottle — fruit, juice, herbs, spices. Seal the bottles. See my flavours guide for specific combinations and quantities.
Step 4: Second Ferment at Room Temperature
Leave the sealed bottles at room temperature for 1–4 days. The residual yeast will consume the added sugars and produce carbonation. In warmer temperatures, this happens faster — sometimes within 24 hours.
Important: burp your bottles daily by briefly opening and resealing them. This releases excess pressure and lets you gauge carbonation levels. An over-pressurised bottle can explode — I’ve cleaned kombucha off my ceiling more than once.
Step 5: Refrigerate and Drink
Once carbonated to your liking, move bottles to the fridge. Cold temperatures stop further fermentation and stabilise the flavour. Kombucha keeps in the fridge for 1–3 months, though the flavour continues to develop and sharpen over time.
Starting Your Next Batch
This is the beauty of continuous brewing. As soon as you’ve bottled one batch, you can start the next immediately using the same SCOBY and your reserved starter liquid. The process repeats indefinitely — I’ve been running the same SCOBY lineage for four years.
Over time, your SCOBY grows thicker. Peel off layers periodically to keep it at a manageable size — or share them with friends. That’s how most home brewers got their start.
Troubleshooting Common Problems
My kombucha isn’t fizzy
Either your bottles aren’t sealed airtight, your F2 time was too short, or there wasn’t enough sugar for the yeast to consume. Add a teaspoon of sugar directly to the bottle before resealing and give it another day.
My kombucha is too vinegary
It over-fermented — leave it shorter next time. Very vinegary kombucha isn’t wasted though: use it as a starter liquid (it’s highly acidic, which is great), add it to salad dressings, or use it to start a kombucha vinegar.
My kombucha is too sweet
Under-fermented — leave it longer. The SCOBY hasn’t had enough time to consume the sugar. Taste daily until the sweetness drops to where you want it.
My SCOBY sank to the bottom
Completely normal. A new SCOBY will form on the surface regardless of where the old one is. Don’t worry about it.
There’s no new SCOBY forming
Check your temperature — too cold slows SCOBY growth. Also check that your vessel is properly covered and getting airflow. If your starter liquid was pasteurised (dead cultures), the fermentation may stall entirely.
Frequently Asked Questions
Q: How long does it take to brew kombucha?
A: First fermentation takes 7–21 days depending on temperature and taste preference. Second fermentation adds 1–4 days. Your first batch will take longer as you learn what works — subsequent batches get faster.
Q: Do I need a SCOBY to make kombucha?
A: Yes. You can grow one from a bottle of raw, unpasteurised store-bought kombucha, but it takes 2–4 weeks. Buying or getting one from a fellow brewer is faster.
Q: Can I use tap water?
A: I’d recommend against it. Chlorine and chloramines in tap water inhibit the SCOBY cultures. Use filtered water or leave tap water uncovered overnight to let the chlorine dissipate.
Q: How do I store my SCOBY between batches?
A: Keep it in a jar with 1–2 cups of starter kombucha at room temperature if you’re brewing weekly. For longer gaps, a “SCOBY hotel” — a jar of kombucha in the fridge — can keep it alive for months.
Q: Is home-brewed kombucha safe?
A: Yes, when brewed with proper hygiene. The acidity of the kombucha environment protects against most harmful bacteria. Clean equipment thoroughly, maintain proper pH, and inspect for mould before drinking. In six years I’ve had two contaminated batches — both obvious, both discarded immediately.
Q: How much kombucha should I drink per day?
A: Start with 100–150ml and build up. Home-brewed kombucha can be more potent than commercial versions. Most regular drinkers settle at 200–300ml per day.
You’re Ready
The first batch is always the hardest — not because the process is complicated, but because you don’t know what to expect. After that, it becomes intuitive. You’ll start to recognise what healthy fermentation looks, smells, and tastes like without thinking about it.
Once you’ve mastered the base brew, explore the flavours guide for second fermentation ideas. And if you want to understand more about what you’re drinking and why it’s good for you, the health guide is worth reading alongside this one.
Good luck with your first batch. Feel free to reach out if something goes wrong — I’ve probably seen it before.